
How to Build AI-Powered Websites: Complete Beginner's Guide
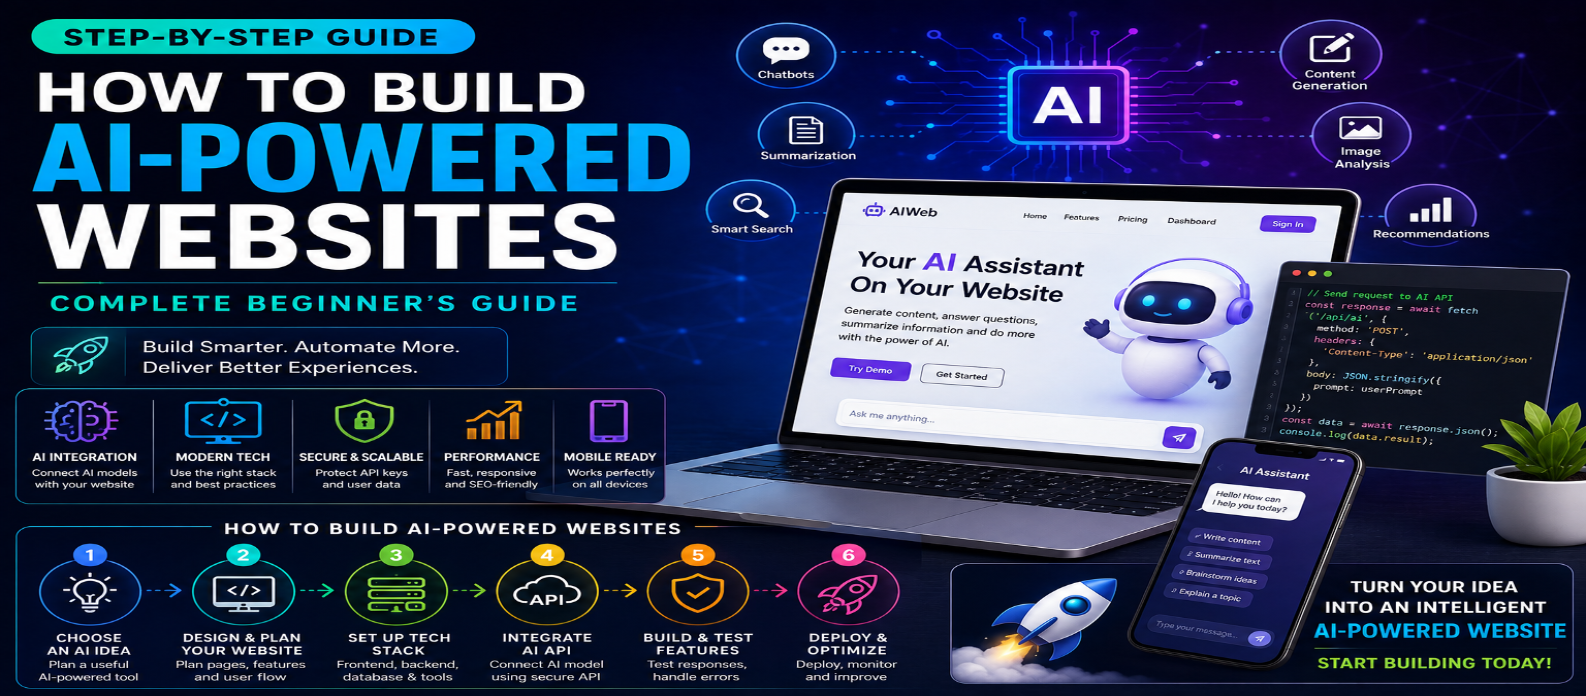
"Learn how to build AI-powered websites step by step, from choosing an AI idea and technology stack to connecting AI APIs, protecting API keys, adding RAG, controlling costs, improving SEO, testing, and deployment."
How to Build AI-Powered Websites: Complete Beginner's Guide
Artificial intelligence is changing what websites can do. Instead of simply displaying information, modern websites can answer questions, generate content, analyze documents, recommend products, summarize information, understand images, and provide personalized experiences.
The good news is that you don't need to be an AI researcher to start building an AI-powered website. With basic web development knowledge, an AI service or model, and a well-designed backend, beginners can add useful AI features to real websites.
This complete beginner's guide explains how to build an AI-powered website step by step, from choosing an idea to launching a secure and useful application.
What Is an AI-Powered Website?
An AI-powered website is a website or web application that uses artificial intelligence to perform tasks that normally require some level of human understanding or decision-making.
Examples include:
- AI chatbots
- Smart search
- Content generators
- Writing assistants
- Recommendation systems
- Document summarizers
- Image analysis tools
- Customer-support assistants
- Translation tools
- AI-powered productivity tools
The AI can run through a cloud-based API, your own backend infrastructure, or, for some use cases, directly within the user's browser.
Step 1: Choose a Useful AI Website Idea
Start with the problem you want to solve rather than the technology.
Beginner-friendly ideas include:
AI Writing Assistant – Generate or improve text.
AI Summarizer – Turn long content into shorter summaries.
AI Chatbot – Answer questions conversationally.
AI SEO Assistant – Generate titles, descriptions, and content ideas.
AI Study Assistant – Explain topics and generate quizzes.
AI Code Helper – Explain or improve code.
Choose one main feature first. A focused website is much easier to build and test than an application trying to do everything.
Step 2: Plan Your Website
Before writing code, define the basic user journey.
For example:
Homepage → User enters prompt → Website sends request → AI processes it → Result appears → User edits or copies result
Decide what pages you need, such as:
- Home
- AI tool
- About
- Pricing
- Login
- Dashboard
- Contact
You should also decide whether users need accounts, saved history, subscriptions, file uploads, or other advanced features.
Step 3: Learn the Web Development Basics
Beginners should understand the foundation of web development before building complex AI applications.
Start with:
- HTML
- CSS
- JavaScript
- HTTP requests
- JSON
- APIs
- Basic Git
- Basic backend development
You don't need to master everything before starting, but understanding these concepts makes troubleshooting much easier.
Step 4: Choose Your Technology Stack
A simple AI website might use:
Frontend: HTML + CSS + JavaScript
Backend: Node.js, Python, PHP, or another server-side technology
AI: AI model or API
Database: PostgreSQL, MySQL, MongoDB, or another suitable database
Hosting: Cloud or web-hosting platform
For larger projects, you may choose a frontend or full-stack framework.
The best stack is not necessarily the most complicated one. Beginners should choose technologies they can understand, maintain, and deploy reliably.
Step 5: Connect Your Website to AI
Most beginner AI websites work by sending information from the website to a backend server.
A simplified workflow looks like:
User → Website → Backend → AI Service → Backend → Website → Result
For example, a visitor enters:
"Write a short product description for a wireless keyboard."
Your frontend sends the request to your backend. The backend sends the required information to the AI service, receives the generated response, and returns it to the browser.
Keeping the AI request on your backend also helps protect private credentials.
Step 6: Protect Your API Keys
One of the most important rules for beginners is:
Never expose private AI API keys in frontend JavaScript.
Anything delivered to the browser can potentially be inspected by visitors.
Keep secrets on the server and use environment variables or another secure secrets-management system.
Your frontend should communicate with your backend rather than directly exposing confidential credentials.
Step 7: Design an Easy-to-Use AI Interface
AI tools should be simple to understand.
A basic interface might contain:
Prompt Box → Generate Button → Loading State → AI Response → Copy/Save Button
Good AI interfaces should also include:
- Clear instructions
- Useful examples
- Error messages
- Loading indicators
- Mobile-friendly layouts
- Accessible controls
Avoid overwhelming beginners with too many options on the first screen.
Step 8: Write Better AI Instructions
The quality of AI output depends partly on the instructions and context provided to the model.
Instead of:
"Write content."
Use a clearer instruction:
"Write a concise product description for an online store. Use simple language, highlight three key benefits, and keep the response under 120 words."
Clear instructions help produce more predictable results.
For production applications, these instructions can be created dynamically by your backend based on the user's selections.
Step 9: Add Your Own Data With RAG
Some AI websites need to answer questions using specific information such as company documents, product data, manuals, or knowledge bases.
A common technique is Retrieval-Augmented Generation (RAG).
A simplified RAG workflow is:
User Question → Search Relevant Data → Send Relevant Context to AI → Generate Answer
This can make an AI application more useful for specialized information.
Beginners should first build a basic AI application before adding RAG because it introduces additional complexity.
Step 10: Add Safety and Input Controls
Never assume every user will use your AI tool exactly as intended.
Consider:
- Input length limits
- Authentication
- Rate limiting
- File restrictions
- Output validation
- Abuse prevention
- Error handling
- User permissions
If your AI system can perform actions rather than only generate text, permissions and confirmation controls become even more important.
Step 11: Control AI Costs
Many AI services charge based on usage.
Without limits, a public AI website can become expensive.
Use techniques such as:
- User quotas
- Rate limits
- Maximum input sizes
- Maximum output lengths
- Authentication
- Usage monitoring
- Caching where appropriate
Track costs from the beginning rather than waiting until your website receives significant traffic.
Step 12: Optimize for Speed and Mobile Devices
Your AI website should still follow normal web performance best practices.
Optimize:
- Images
- JavaScript
- CSS
- Fonts
- Server responses
- Database queries
AI responses can take time, so provide a visible loading state instead of making the interface appear frozen.
Step 13: Make Your Website SEO-Friendly
If your AI website contains public pages, optimize them for search engines.
Focus on:
- Descriptive page titles
- Meta descriptions
- Clean URLs
- Semantic HTML
- Internal links
- Mobile usability
- Fast loading
- Helpful original content
Don't rely entirely on dynamically generated AI content as your SEO strategy. Create useful permanent pages that clearly explain what your tool does and how visitors can benefit from it.
Step 14: Test Your AI Website
Before launch, test:
Normal Requests → Unexpected Inputs → Errors → Mobile Devices → Slow Connections → Security → AI Output Quality
Also test what happens when the AI provider is temporarily unavailable or returns an unexpected response.
Your website should fail gracefully rather than displaying confusing technical errors.
Step 15: Deploy and Monitor
Once testing is complete, deploy your website.
After launch, monitor:
- Errors
- AI usage
- API costs
- Response times
- Security events
- User feedback
- Website traffic
- AI output quality
An AI application requires ongoing monitoring because models, user behavior, APIs, and costs can change over time.
Beginner AI Website Roadmap
A practical learning sequence is:
HTML → CSS → JavaScript → APIs → Backend → AI API → Database → Security → RAG → Deployment
Start small.
Build one useful AI feature, make it reliable, and then gradually add more capabilities.
Conclusion
Building an AI-powered website is much more accessible than it once was. Beginners can combine standard web technologies with modern AI services to create chatbots, writing tools, smart search, summarizers, assistants, and many other useful applications.
The most important principle is to build AI on top of strong web development fundamentals.
Choose a useful problem, create a simple interface, keep private credentials on the backend, control costs, protect your application, test AI outputs, and monitor the website after launch.
With the right approach, you can move from a basic idea to a secure, practical, and genuinely useful AI-powered website—even as a beginner.
Get a Free Access To 200+ Free Tools:
|
Home Page |
|
|
Calculator Tools |
|
|
Text & Converter Tools |
|
|
PDF & Image Tools |
|
|
Games & Developer Tools |
|
|
Resume Builder |